
Water Softener Leaking From the Top? Fix Brine Tank Overflow and Valve Failure
It is 9pm, there is water on the basement floor, and the puddle traces back to the top of your softener. If you have a water softener leaking from the top of the brine tank or the control head, this guide walks you through stopping it tonight, step by step. Most top leaks come from two places: a brine tank that overfilled, or a failing valve on the control head. Both can usually wait until morning once you shut things down correctly. Here is how to do that, and how to tell which problem you have.
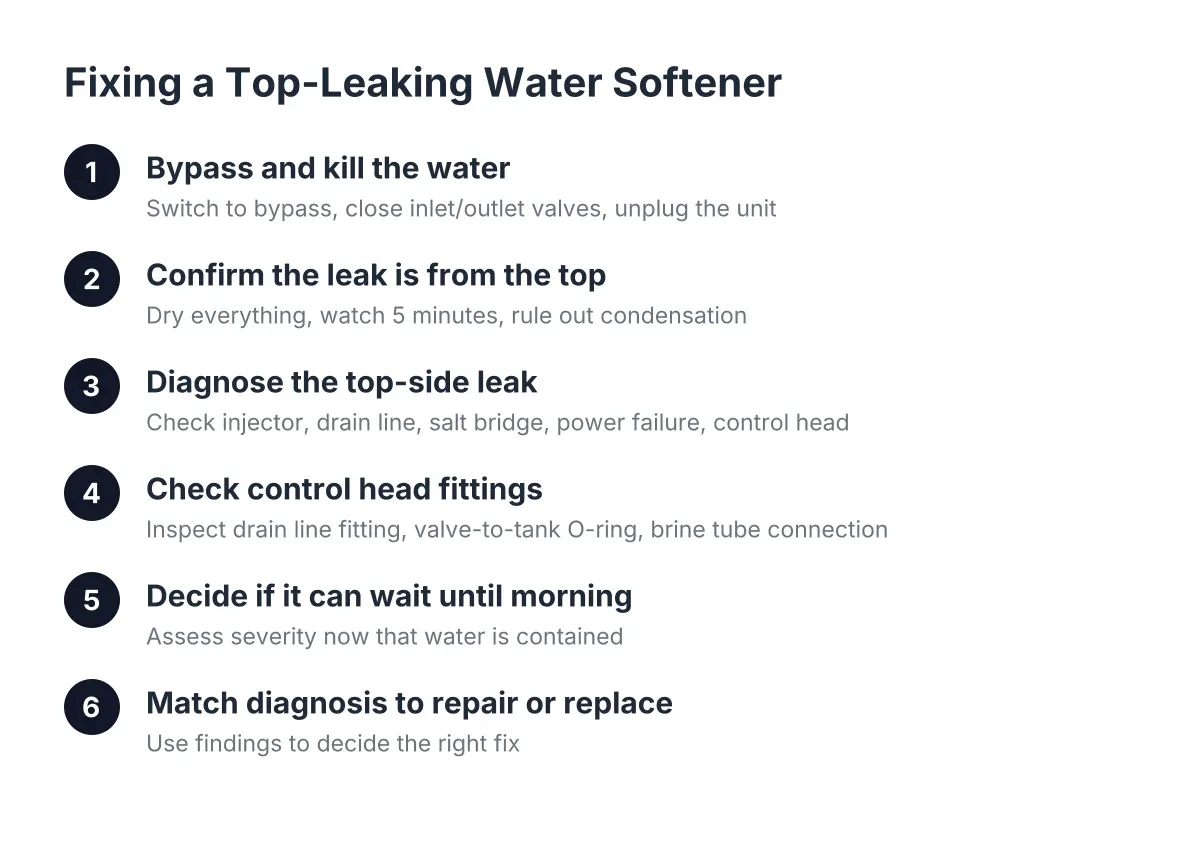
Step 1: Put the Softener in Bypass and Kill the Water Feeding It
First, stop more water from entering the unit. Nearly every softener has a bypass valve where the plumbing meets the control head. It is a knob, lever, or push-button on the back of the unit. Turn or push it to "bypass." Your house keeps full water pressure; the softener just stops getting fed. The water will be hard for a day or two, but hard water will not flood your basement.
According to InspectAPedia, most softener installs also have dedicated inlet and outlet valves separate from the main house shutoff. If your bypass valve is stuck or corroded, close those two valves instead. Only shut off the main house supply as a last resort.
In addition, unplug the softener from the wall outlet. This stops the control head from starting a regeneration cycle while you are troubleshooting. A regeneration with the unit in bypass can confuse the valve and push more water where you do not want it.
Step 2: Confirm the Water Is Coming From the Top, Not Just Ending Up There
Next, dry everything with a towel and watch for five minutes. Water runs downhill and pools in misleading spots, so a puddle at the base does not always mean a softener leaking from the top. Wipe the top of both tanks, the control head, the fittings, and the tubing, then look for the first bead of new water.
One common false alarm: condensation. A tall resin tank full of cold Minneapolis water will sweat in a humid basement, and that sweat drips and pools like a leak. If the whole tank is evenly damp with no single wet point, you likely have condensation, not a leak. An uninsulated tank in a summer basement can produce a surprising amount of water this way.
If you confirm real water coming from the top of the system, it is almost always one of these:
- Brine tank overflowing from the top edge or the small overflow elbow on the side near the top
- Control head leaking at the valve body, the drain line fitting, or where the head threads onto the resin tank
- Brine tank connection where the thin brine tube enters the salt tank lid or the control valve
- Drain line leaking at its fitting or spraying during a regeneration cycle
Step 3: Diagnosing Water Leaking from Softener Top
A softener leaking from the top of the salt tank means too much water got in, or water that should have been drawn out never left. The brine tank is supposed to hold a modest amount of water that dissolves salt. During regeneration, the control valve pulls that brine out through a small tube. When that draw fails, water keeps building until it hits the overflow.
Open the lid and look. If the tank is full of water well above the salt line, check these causes in order:
- Clogged injector or venturi. This small part creates the suction that pulls brine out of the tank. Sediment or salt residue plugs it, the brine never leaves, and the tank slowly fills. A full brine tank plus water on the floor is the classic sign.
- Kinked, clogged, or frozen drain line. The softener pushes rinse water out through a drain line to your floor drain. If that line is pinched behind the tank, plugged with debris, or frozen in a cold Minnesota utility room, water backs up into the brine tank instead.
- A salt bridge or salt mush. Salt contains insoluble material that settles at the bottom of the brine tank over time and needs periodic cleanout, according to Cargill. A crusted or mushy layer can block the float assembly and throw off the fill level.
- A power failure mid-regeneration. If the power blinked while the unit was regenerating, the cycle may have stalled with the fill valve open. The safety float usually stops a disaster, but water can still reach the overflow elbow.
- A failing control head. If the brine tank fills on its own with no regeneration scheduled, or the unit sticks mid-backwash, the drive assembly inside the valve is often the culprit. That is a repair-level problem, not a tonight problem.
For tonight, the fix is the same regardless of cause: leave the unit in bypass and unplugged, and scoop or wet-vac excess water out of the brine tank so it cannot overflow again. Diagnosis can wait for daylight or a service call.
Step 4: If the Leak Is at the Control Head, Check Fittings Before Blaming the Valve
Suppose the water is beading at the control head itself, the molded valve on top of the resin tank. Check three spots with the unit still in bypass.
First, the drain line fitting. A drain line that drips or leaks at the valve often points to a worn piston seal inside the control head. That is fixable; a technician replaces the piston and seal pack rather than the whole softener. This matters for the repair-versus-replace question, because a seal pack is a modest parts-and-labor job, not a new system.
Second, the valve-to-tank connection. The control head threads onto the resin tank with an O-ring. Try tightening it a quarter turn by hand. However, if tightening does not stop the seep, the tank threads or the tank itself may be cracked. A cracked resin tank is the one top-side failure that usually means replacing the tank and media, or the whole unit on an older system.
Third, the brine tank connection, where the thin tube from the salt tank meets the valve. These compression fittings loosen over time. Hand-tighten the nut and check that the tube is not split at the ferrule.
Step 5: Decide Tonight Whether This Can Wait Until Morning
Here is the honest answer to the 9pm question. If the softener is in bypass, unplugged, and the brine tank is below the overflow, yes, it can wait. The leak source has no water pressure behind it anymore. Mop the floor, set a fan on the wet area, and sleep.
Therefore, the only situations that justify an emergency call tonight are these: the bypass valve is stuck and you cannot isolate the unit, water keeps appearing after bypass (which suggests a plumbing leak near the softener, not the softener itself), or water is reaching finished flooring, drywall, or stored belongings.
For a property manager with twenty units across the metro, the same triage applies at scale. Say a tenant reports water near the softener in a Richfield fourplex at 9pm. A maintenance tech who can put the unit in bypass over the phone turns an emergency dispatch into a scheduled next-day service call, and the building keeps running water the whole time.
Step 6: Match the Diagnosis to a Repair-or-Replace Decision
Once you know where the leak starts, the repair math gets clearer. As a rough illustrative guide for 2026, not a quote:
- Clogged injector, drain line, or brine tube fitting: inexpensive parts, a straightforward softener repair, worth fixing on nearly any unit.
- Piston and seal pack in the control head: moderate cost, still usually cheaper than replacement if the resin and tanks are healthy.
- Failed drive assembly or control head on a unit past 12 to 15 years: replacement often wins, since resin degrades on roughly the same timeline.
- Cracked resin tank: almost always replacement territory.
Keep the local water in mind when you weigh this. Minneapolis-area homes see hardness of 15 or more grains per gallon from mineral-heavy Mississippi River water, according to HomeWater 101. At that hardness, running without a softener for weeks means scale buildup returns fast on water heaters, dishwashers, and fixtures, so drag out the decision and you pay for it elsewhere. If you do replace, a high-efficiency unit can be programmed to use less salt and water than a standard model, according to Culligan, which matters in a state where chloride from softener discharge already stresses groundwater.
One caution: if you cannot find the source after drying and watching, or if the leak sits at a sweated copper joint rather than the softener itself, bring in a professional. Water softener leaks and plumbing leaks sit inches apart in most basements, and opening a pressurized valve body without the right parts on hand usually makes the night worse. A local softener specialist who sees these failures weekly can tell a seal pack from a cracked tank in minutes.
Quick Reference: Top-Side Leak Sources at a Glance
- Brine tank overflow with a full tank: clogged injector or blocked drain line
- Brine tank fills by itself: failing control head drive assembly
- Drip at the drain fitting: worn piston seal inside the valve
- Seep at the valve-to-tank joint that tightening does not fix: likely cracked tank
- Even dampness on the whole tank, no wet point: condensation, not a leak
Bypass first, diagnose second, decide third. Do those in order and a water softener leaking from the top stays a mop-up job instead of a basement repair.
If you need water softener installation, Twin Cities Water Softening can help.
Prefer to talk it through? Call +16512171659 — a quick call is usually the fastest way to get a straight answer for your situation.