
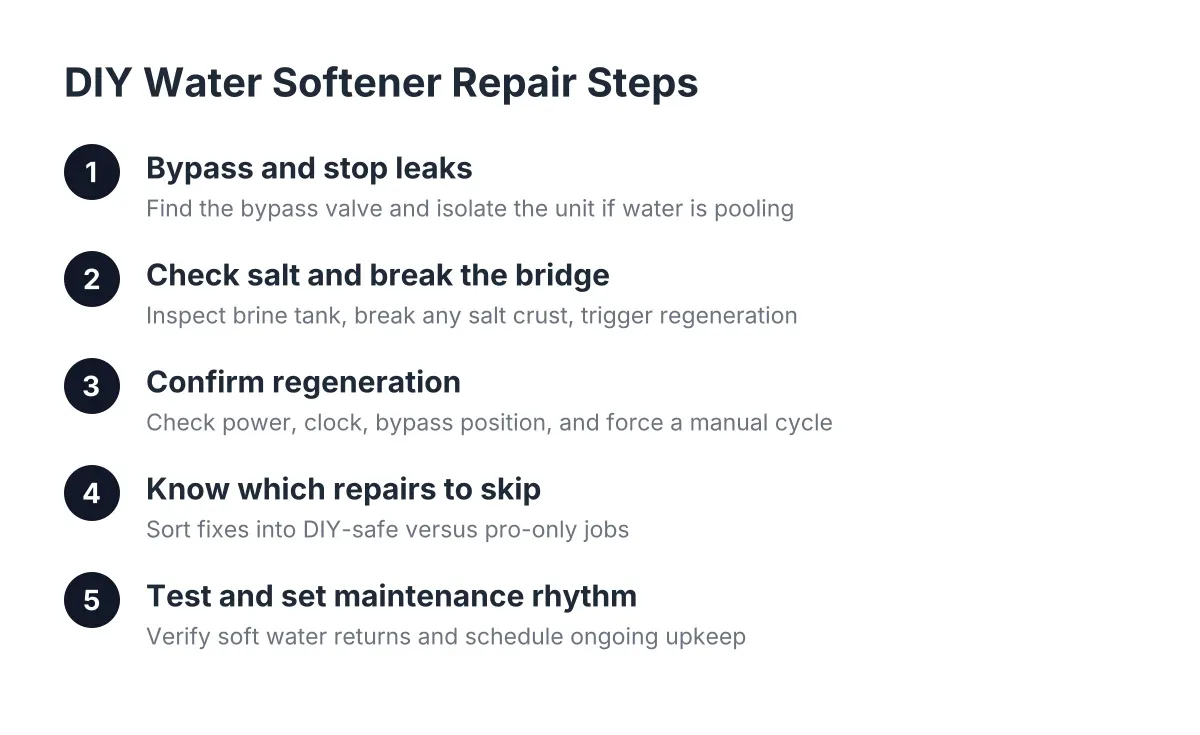
DIY Water Softener Repairs: Which Fixes Work and Which Need a Pro
Your softener quit. Maybe there is water pooling near the resin tank, maybe the salt level has not budged in two months, or maybe the hard water spots came back on your glasses after years of soft water. Before you call anyone, know this: several of the most common failures are honest DIY water softener repairs you can handle in an afternoon with a broom handle and a bucket. Others are not, and knowing the difference is what keeps you from paying for a service call you did not need, or wrecking a valve you did.
This guide walks you through the triage in order. Start at Step 1 and work down. Most Minneapolis homeowners who follow these steps either fix the problem themselves or know exactly what to tell a repair tech when they call. Either way, you stop guessing.
One note on why this matters here. According to HomeWater 101, the Twin Cities metro draws mineral-heavy water from the Mississippi River, with hardness at 15+ grains per gallon for Minneapolis-area homes. That is genuinely hard water. When a softener in a pre-1980 house dies, you feel it within days: dry skin, spotted dishes, and scale buildup starting fresh on your fixtures and water heater.
Step 1: Put the Softener in Bypass and Stop Any Leak
First, protect the basement. If water is pooling anywhere near the unit, find the bypass valve. It is usually a knob, lever, or push-button on the back of the control head where the pipes connect. Turn it to bypass. Your house still gets water; it just skips the softener.
According to InspectAPedia, most softener setups have dedicated inlet and outlet valves separate from the main house shutoff, so you can isolate the unit without cutting water to the whole house. Older homes sometimes have those valves seized or missing. If yours will not turn, shut off the main and move on.
Now look at where the water is coming from:
- Fitting or connection drips. Often a DIY fix. Tighten gently or replace an O-ring.
- Cracked brine tank or resin tank. Not repairable in any practical sense. That is replacement territory.
- Water from the control head itself. Usually a worn seal or piston inside the valve. Possible DIY on some models, but easy to make worse.
- Not the softener at all. Older basements hide leaks from nearby supply lines and the water heater. Trace the water uphill before you blame the softener.
If the bypass valve itself is stuck or dripping, do not force it with a wrench. A stuck bypass valve on a 15-year-old unit can snap, and now a contained problem is an emergency. That one goes on the pro list.
Step 2: Check the Salt, and Break the Bridge
If the softener is not leaking but the water went hard, salt is the first suspect. Water softeners rely on salt to regenerate the resin bed, which is what pulls hardness minerals out of your water, according to North Dakota State University Extension. No working salt, no soft water. It is that direct.
Open the brine tank lid and look. According to Culligan, a typical household refills salt every two to four months, though water hardness and family size change that. With Minneapolis hardness levels, lean toward the shorter end. If the tank looks full but the level has not dropped in months, you likely have a salt bridge.
A salt bridge is a hard crust of salt that forms above the water line with a hollow gap underneath. The softener regenerates with plain water, does nothing, and you never notice until the hard water spots show up. Breaking a salt bridge is one of the most satisfying DIY water softener repairs:
- Take a broom handle or something similar with a blunt end.
- Push it straight down into the salt in several spots.
- When you hit crust, tap firmly until it collapses. You will feel it give.
- Break up the chunks, and scoop out any mush at the bottom if it is heavy.
- Trigger a manual regeneration from the control head that night.
While you are in there, look at the bottom of the tank. According to Cargill, softener salt contains insoluble material that builds up at the bottom of the brine tank over time and needs periodic cleanout. In a 20-year-old unit that has never been cleaned, that sludge layer can be inches deep. Emptying and rinsing the brine tank is messy but firmly DIY.
Step 3: Confirm the Softener Is Actually Regenerating
Next, check whether the unit is even trying to do its job. If your softener is not regenerating, nothing downstream matters.
Check the obvious first. Is the unit plugged in, and did a tripped breaker or a power blink reset the clock? A softener whose internal time is wrong may regenerate at 2 p.m. while you are running laundry, or never. Reset the time and force a manual regeneration; most control heads have a button or dial for this. Listen. You should hear water moving through cycles over the next hour or two.
Also check the bypass. Here is a scenario that plays out constantly: suppose a plumber visits an older Minneapolis home to swap a water heater, flips the softener's three-way bypass so it stays out of the way, and forgets to reopen it. Two weeks later the homeowner is searching "water softener not working" when nothing is broken at all. Confirm the bypass is in the service position before you touch anything else.
If the unit powers up, the time is right, the bypass is open, and a forced regeneration still produces hard water, the problem is deeper. That points to the resin bed or the control valve, which brings us to the line you should not cross alone.
Step 4: Know Which DIY Water Softener Repairs to Skip
Some fixes look simple on video and go sideways in real basements. Here is the honest dividing line.
Handle these yourself
- Breaking a salt bridge and refilling salt
- Cleaning out the brine tank and the brine well
- Resetting the clock and hardness settings after a power blink
- Cleaning the venturi and nozzle screen, if your model has an accessible one
- Confirming and operating the bypass valve, when it moves freely
- Basic water softener repair maintenance like checking for salt mush every few months
Call a specialist for these
- Resin bed failure. If your softener is original to a pre-1980 house, or even 15 to 20 years old, the resin is likely worn out. Rebedding a tank means dealing with the distributor tube, gravel underbedding, and getting old resin out. It is a resin tank service job, not a Saturday project.
- Control valve rebuilds. Pistons, seals, and spacers inside the head must go back in exact order. One nicked seal and the unit leaks hard water past the resin permanently.
- Stuck or leaking bypass valves. Forcing them cracks housings. A pro can replace the valve body without flooding your utility room.
- Reprogramming for aging resin. As resin loses capacity, settings need adjusting based on actual measured hardness, not guesswork. A tech should test your water in grains per gallon and set the unit to match.
- Iron staining on top of hardness. Ion exchange softeners can help reduce small amounts of iron in well water, according to Penn State Extension, but heavy orange staining in the suburbs usually means the softener needs help from dedicated iron filtration. That is a sizing and water treatment question, not a repair.
There is also a repair-versus-replace judgment call a homeowner cannot always make alone. Many big box store softeners were built as throwaway units; parts are scarce and a control head rebuild can cost more than the unit is worth. On a quality unit, water softener repair is often the smart money. An honest local tech will tell you which one you own before quoting anything, and if yours says replace without explaining why, get a second opinion.
Step 5: Test the Result and Set a Maintenance Rhythm
After any fix, DIY or professional, run the unit through a full regeneration and check for leaks at each stage of the cycle. If anything drips, go back to bypass before it spreads. Then confirm you actually have soft water. Soap should lather fast, and glasses should come out of the dishwasher spot-free within a few loads.
If you are wondering what is hard water doing to you in the meantime, the short answer is cosmetic and mechanical damage, not danger. Hard water will not directly cause hair loss, though it leaves mineral film that makes hair feel dry and brittle. The real cost is scale buildup shortening the life of your water heater and dishwasher.
Finally, put simple water softener repair service on the calendar so you are not back in firefighter mode next winter:
- Check salt monthly; refill before the tank drops below one-third
- Probe for salt bridges every time you refill
- Clean the brine tank once a year
- Sanitize the system after a boil-water order or an extended absence, per Kinetico's guidance
- Have a professional clean the control valve and test your water annually
One last Minnesota-specific thought. According to the Minnesota Pollution Control Agency, 75% of Minnesotans rely on groundwater for drinking water, and softener salt discharge contributes to chloride pollution in it. An old, mis-programmed softener wastes salt with every cycle. Getting yours repaired correctly, or upgraded to a high-efficiency unit that uses less salt and water, is good for your fixtures and for the water everyone downstream drinks. Fix it right once, and the broom handle stays in the closet.
If you need water softener installation, Twin Cities Water Softening can help.
Prefer to talk it through? Call +16512171659 — a quick call is usually the fastest way to get a straight answer for your situation.