
Why Water Softener Leaks Happen: Mineral Buildup, Cracked Tanks, Worn Seals
It is 9pm, there is water on your basement floor, and you need two answers fast: is the softener the problem, and can it wait until morning. When you need to diagnose a water softener leak, most trace back to mineral buildup, cracked tanks, or worn seals. This guide walks you through finding which one you have. Follow the steps in order. Most of the time you can stop the water tonight and decide on repair or replacement in daylight.
This matters even more if the unit is 15 or more years old, or if it sits in the basement of a rental you own. An old softener that leaks once will usually leak again. The steps below stop the immediate problem and tell you whether you are looking at a simple fix or a replacement conversation.
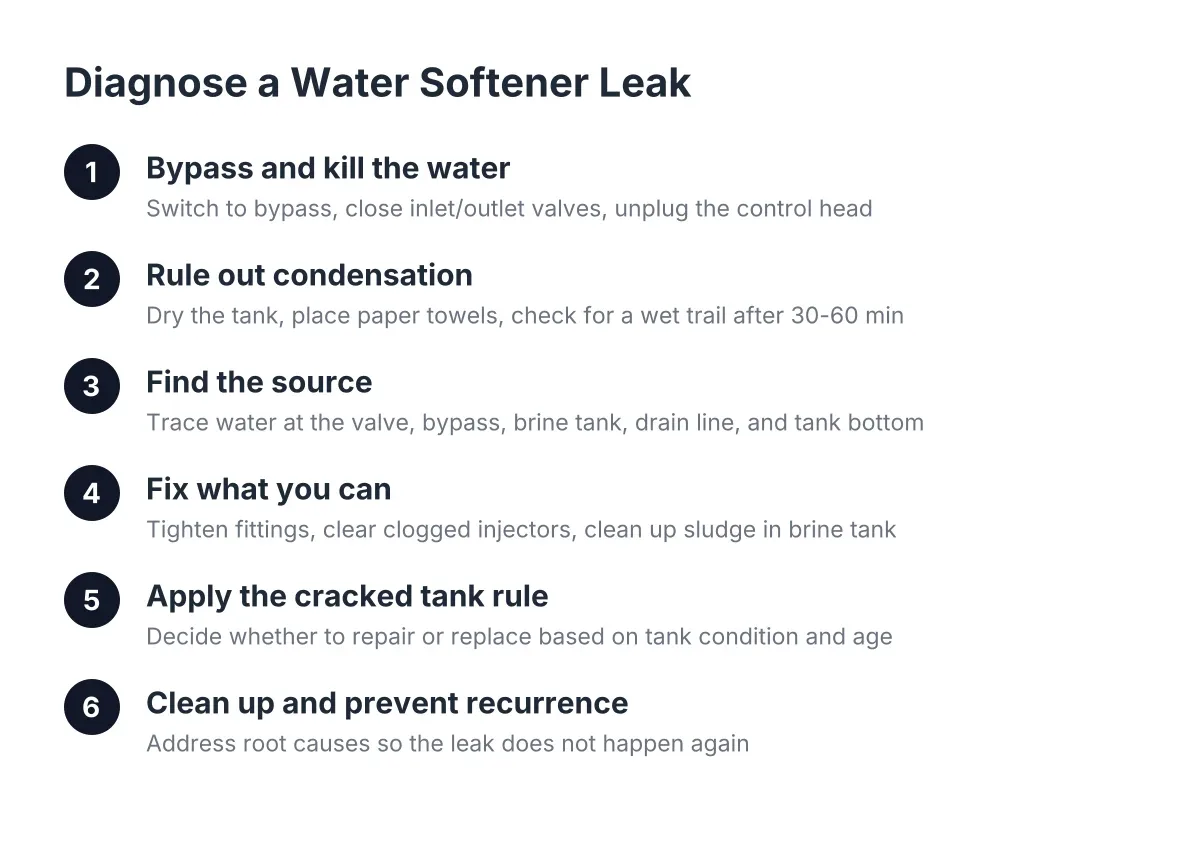
Step 1: Put the Softener in Bypass and Kill the Water to It
First, stop feeding the leak. Nearly every softener has a bypass valve where the plumbing meets the control head. It is a knob, lever, or push-button on the back of the unit. Turn it to "bypass" and the house keeps running on hard water while the softener is cut off.
According to InspectAPedia, softeners typically have dedicated inlet and outlet valves separate from the main house shutoff. Close those too if you can find them. If the bypass is stuck or corroded, which is common on 15-year-old units, shut off the main water supply to the house instead. Do not force a frozen bypass valve; a cracked bypass housing turns a drip into a flood.
Unplug the control head from the outlet as well. This stops the softener from starting a regeneration cycle and pushing more water through a failed seal while you sleep.
Can it wait until morning? Once the unit is bypassed and unplugged, yes, in nearly every case. The softener holds a limited amount of water. With the supply cut, the worst it can do is finish draining what is already inside.
Step 2: Rule Out Condensation Before You Rule In a Leak
Here is the diagnosis most people skip, and it saves the most panic. The most common "leak" on a water softener is not a leak at all. It is condensation. Cold Minneapolis water runs through an uninsulated tank in a humid basement, the tank sweats, and the water drips to the floor and pools underneath.
Wipe the tank completely dry with a towel. Put dry paper towels or newspaper under and around the unit. Wait 30 to 60 minutes. If the paper shows a wet trail starting at a fitting, a valve, or the tank wall, you have a real leak. If moisture appears evenly across the tank surface with no source point, you have sweat, not a failure.
While you wait, check the usual impostors nearby. A water heater drain valve, a floor drain backing up, or a leaking toilet upstairs can all put water near the softener. Trickle leaks from toilet flappers are a common hidden water waster in rentals; if you own the property, that check protects both the floor and the water bill.
Step 3: How to Diagnose Water Softener Leaks and Find the Source
Mineral buildup causes water softener leaks by clogging the injector and drain path, forcing water where it should not go. Hard water scale and salt residue slowly plug the venturi that draws brine, so the brine tank overfills and spills onto the floor. Scale also grinds seals and O-rings until they weep at connections.
Minneapolis water is rough on this equipment. The Twin Cities metro draws mineral-heavy water from the Mississippi River, producing hardness of 15 or more grains per gallon for Minneapolis-area homes, according to HomeWater 101. In addition, according to Cargill, softener salt contains insoluble material that settles at the bottom of the brine tank over time and needs periodic cleanout. That sludge feeds the clogs that cause overflow.
Now trace the water with a flashlight. Check these spots in order:
- Top of the resin tank, at the control valve. Wet threads here usually mean a worn O-ring or a loose valve-to-tank connection.
- The bypass valve itself. Internal seals dry out and crack with age; a bypass that drips when turned is a seal problem.
- Brine tank (the salt tank). Standing water near the top edge points to overflow from a clogged injector or a stuck float. Water seeping from the bottom means a crack or a failed fitting on the brine line.
- The drain line. A softener leaking water into the drain constantly, outside of regeneration, often means a worn piston seal inside the control valve.
- Bottom of the resin tank. Water weeping from the tank body itself, not a fitting, points to a cracked tank.
Timing is a clue too. A leak that only shows up sometimes almost always happens during regeneration, when the unit pressurizes the drain path. A constant drip points to a seal, fitting, or crack on the pressurized side.
Step 4: Fix What Mineral Scale and Worn Seals Will Let You Fix
Some water softener leaks that mineral scale and age cause are homeowner-fixable tonight or tomorrow. Others are not worth touching. Here is the honest split.
What you can do yourself
If the leak is at the valve-to-tank connection, try tightening it by hand or gently with a strap wrench. Do not crank hard on old plastic threads. If a hose clamp on the drain line or brine line is loose, snug it up. If the brine tank overflowed because the drain line is kinked or frozen, which happens in Minnesota garages and crawl spaces, straighten or thaw the line and the overflow usually stops.
A clogged injector is also a fair DIY job on many units. When you work to diagnose a water softener leak from a clogged injector, bypass the softener, pop the injector cap on the control head, and soak the small parts in warm water to dissolve the scale. If the brine tank stays full and the floor keeps getting wet, that clogged venturi is the likely reason the unit is not drawing brine down.
What needs a pro
Call for softener repair when the leak involves the control valve internals, such as a worn piston and seal pack. That is a rebuildable part, and a repair beats replacing the whole unit, but it takes the right seal kit and know-how. The same goes for a cracked bypass housing or corroded plumbing at the connections; old pipes near a softener can hide damage that a wrench makes worse. Searching "water softener repair near me" at 9pm is fine, but with the unit bypassed you can wait and book a normal service call instead of paying emergency rates.
Step 5: Apply the Cracked Tank Rule and Decide Repair or Replace
Here is the decision rule that settles most of these calls. If you tightened the valve-to-tank connection and the leak continues, or if water weeps from the tank body itself, the tank is cracked. A cracked resin tank is not patchable in any lasting way. At that point you are replacing the tank and media, or more often the whole softener.
For a Replacement Planner with a 15-year-old unit, the math usually points one way. Suppose your softener went in around 2010, the bypass valve is stiff, and now the tank seeps at the base. Sinking money into a seal kit for a unit that old fixes one failure point out of several. Modern high-efficiency softeners can be programmed to use less salt, water, and energy than standard units, according to Culligan, so replacement also cuts the salt bags you haul downstairs.
The same logic applies if you own rentals. Say a landlord finds a leaking 18-year-old softener during a unit turnover in south Minneapolis. In that scenario, a scheduled water softener replacement during the vacancy beats an emergency softener repair with a tenant in place, and a properly sized new unit means fewer service calls for the next decade. As of 2026, water softener system installation cost varies enough by size and type that comparing two or three quotes is reasonable; just make sure each quote sizes the unit to the household, not to the biggest tank on the truck. A search for "water softener installation near me" plus a request for sizing based on your actual hardness and occupancy keeps you from being oversold.
One trade-off to know before you replace: softened water can slowly dissolve old scale buildup inside aging pipes, and that scale sometimes hid pinhole cracks. If your home has original galvanized plumbing, have the installer look it over during the water softener installation so a new leak does not surprise you a month later.
Step 6: Clean Up and Prevent the Next Leak
Once the water is stopped, dry the floor fast. Concrete forgives standing water; drywall, carpet, and stored boxes do not. Run a fan on the area overnight and check for moisture under nearby flooring.
Then set up a short prevention routine, because the same minerals that caused this leak keep working on the replacement:
- Clean the brine tank once a year. Dump the sludge at the bottom before it clogs the injector again.
- Check salt every couple of months. According to Culligan, typical households refill salt every two to four months, and a softener that stops eating salt is showing an early failure sign.
- Look at the drain line each fall. Kinks and freezing are the two cheapest leaks to prevent in a Minnesota winter.
- Put a leak sensor on the floor by the unit. A $15 alarm beats finding the puddle at 9pm. That is an illustrative price, but sensors in that range are common.
- Test your water hardness after any repair. If hard water stains return on fixtures, the softener is not doing its job even if it is not leaking.
The short version: bypass the unit, rule out condensation, trace the drip, and apply the cracked-tank rule. Mineral buildup, worn seals, and cracked tanks cause almost every softener leak, and each one has a clear next move. Stop the water tonight, then make the repair-or-replace call on your own schedule instead of the softener's.
If you need water softener installation, Twin Cities Water Softening can help.
Prefer to talk it through? Call +16512171659 — a quick call is usually the fastest way to get a straight answer for your situation.