
Water Softener Leak Locations: Brine Tank, Valve, and Bypass Explained
Water on the floor at 9pm, and the softener is the first suspect. Before you panic, know this: most water softener leak locations come down to three spots, the brine tank, the control valve on top of the resin tank, and the bypass valve where the plumbing connects. This guide walks you through each one, step by step, so you can figure out what is leaking, stop the water tonight, and decide whether this can wait until morning.
The short answer for tonight: almost every softener leak can be stopped in under five minutes by flipping the bypass valve. Water keeps running to the house, and the leak stops. Then you can diagnose calmly instead of mopping in a panic.
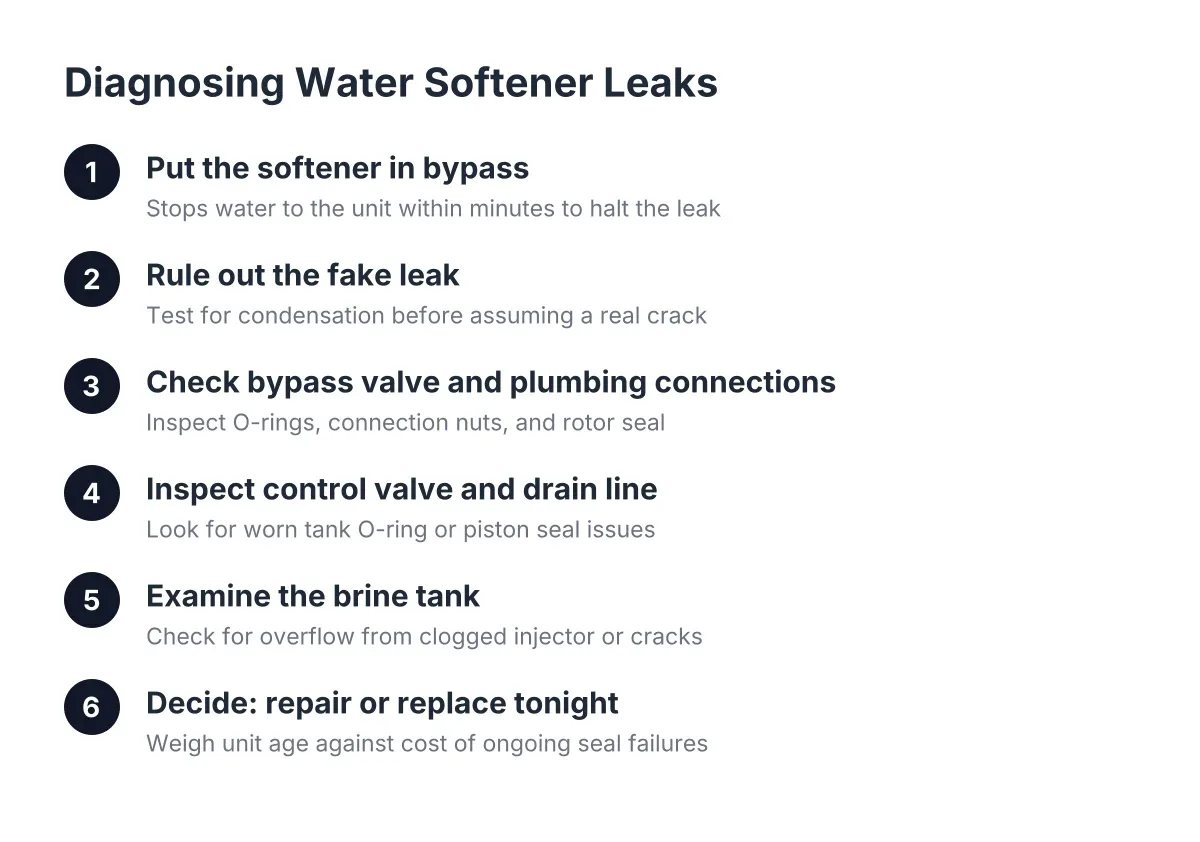
Step 1: Put the Softener in Bypass and Stop the Water
First, find the bypass valve. It sits where the house plumbing meets the softener head, on top of the resin tank. It is usually a single lever, a push button, or a pair of small knobs labeled bypass.
Turn it to bypass. This routes household water around the softener entirely, so the unit stops taking on pressure while your faucets, toilets, and water heater keep working. According to InspectAPedia, most water softeners have dedicated inlet and outlet valves separate from the main house shutoff, so you can isolate the unit without cutting water to the whole house.
Now watch the leak for two or three minutes. This is also your first diagnostic test. If the dripping stops in bypass, the leak is inside the softener or its fittings. If water keeps coming, the leak is in your house plumbing near the softener, not the softener itself, and that is a plumber problem, not a softener repair.
One more note before you relax: if you cannot find or move the bypass valve, shut off the main water supply to the house. It is a blunt fix, but it stops the damage.
Step 2: Rule Out the Fake Leak First
The most common apparent leak on a water softener is not a leak at all. It is condensation. Cold Minneapolis water runs through an uninsulated tank, the tank sweats in a humid basement, and water beads down the sides and pools at the base. It looks exactly like a slow bottom leak.
Here is the test. Dry the tank completely with a towel. Then tape a dry paper towel to the side of the tank and another under the base. Check both after an hour. Condensation wets the side towel evenly; a real leak wets the bottom towel from one spot.
For example, say a homeowner in a Richfield rambler finds a damp ring around a 16-year-old softener every July but never in January. That pattern points to summer humidity and condensation, not a cracked tank. A real crack leaks year round and gets worse, not better.
Step 3: Common Water Softener Leak Locations on Bypass Valve and Plumbing Connections
If the leak is real and it stopped when you flipped the bypass, start your inspection at the top. The bypass valve and the inlet and outlet connections are the most common spots where water softener leaks appear on units past the ten-year mark, especially here in the Twin Cities where hard water runs 15 or more grains per gallon in Minneapolis-area homes, according to HomeWater 101. That mineral load wears seals faster.
Run a dry finger or paper towel around each of these spots and look for the wet trail:
- The bypass valve body itself, where internal O-rings dry out and crack with age
- The two connection nuts where the copper or plastic supply lines meet the softener head
- The rotor seal area on the control valve, which weeps when the seals wear
- Any soldered or push-fit joints within a foot of the softener
A drip at a connection nut sometimes just needs a careful quarter-turn snug. A leak from inside the bypass valve body means the O-rings or the whole bypass assembly need replacement. That is a common softener repair, and on a unit under ten years old it is usually worth doing. On a 15-year-old unit, it is a signal to price a replacement alongside the repair, since the next seal is not far behind.
Step 4: Inspect the Control Valve and Drain Line
Next, look at the control valve, the head unit with the display or timer dial. Two leak paths live here.
The first is the seam where the valve threads onto the resin tank. A slow weep at that seam usually means a worn tank O-ring, a cheap part but a job that requires depressurizing and unscrewing the head. The second is the drain line, the small flexible tube running from the valve to your floor drain.
A drain line that drips or runs constantly is often not the line's fault. Inside the control valve, a worn or torn piston seal lets water sneak past into the drain path even when the softener is not regenerating. The fix is a piston and seal pack replacement inside the valve, not a new softener. This is the kind of water softener repair where a specialist earns their keep, because the parts are model-specific and easy to misdiagnose.
Also check the drain line itself for kinks, clogs, or a frozen section. In a Minnesota basement or garage wall, a drain line that runs near a rim joist can freeze in January, back water up, and cause the brine tank to overflow.
Step 5: Examine the Brine Tank for Overflow or Cracks
The brine tank is the shorter, wider tank that holds the salt. Water pooling around it comes from one of two problems: the tank is overflowing, or the tank is cracked.
Overflow is far more common. Lift the lid. If the water level sits high and stays high, the softener is adding water to the tank but not drawing it back out during regeneration. The usual culprits are a clogged venturi injector in the control valve, a blocked or kinked drain line, or an internal valve leak. Salt itself contributes here; according to Cargill, softener salt contains insoluble material that builds up at the bottom of the brine tank over time and needs periodic cleanout. That sludge can block the brine draw.
A cracked brine tank is rarer but obvious once you look. Empty tanks crack from impact, like a 50-pound salt bag dropped on the rim, or from a salt bridge collapsing. A cracked brine tank on an older unit almost always tips the repair-or-replace math toward replacement, since the tank, the valve seals, and the resin are all aging together.
While you are in there, note your salt habits. According to Culligan, typical households refill softener salt every two to four months. If you have been refilling far more often on an old unit, the softener may be regenerating inefficiently, wasting salt and water along with the leak risk.
Step 6: Decide Tonight Whether This Can Wait Until Morning
Here is the decision that matters at 9pm. With the softener in bypass and the leak stopped, almost every scenario can wait until morning. You have soft-water loss, not water damage. Hard water for a day or two will not hurt your plumbing.
Use this quick triage:
- Leak stopped in bypass, small puddle only: mop up, leave it bypassed, and book a service call at normal hours.
- Leak continues in bypass: the problem is house plumbing, not the softener. Shut the main if it is active flow, and call a plumber tonight if it will not stop.
- Brine tank overflowing: scoop or siphon the water level down below the overflow point, leave the unit in bypass, and schedule water softener service.
- Resin tank actively spraying under pressure: bypass immediately; if bypass does not stop it, shut the main.
The one situation that cannot wait is active flow you cannot stop. Everything else is a scheduling question, not an emergency.
Identifying Water Softener Leak Locations: Repair or Replace
Once you know the source, the leak location itself tells you a lot about the smart next move. Repeated water softener leaks on a unit past 12 to 15 years are rarely isolated failures; they are the seals, valve internals, and tank all reaching end of life together.
As a rough guide for a unit that is 15 or more years old: a loose connection nut is a fix, a bypass O-ring is a judgment call, and a cracked resin or brine tank is a replacement. For a property manager running 20-plus units across the metro, that math gets sharper. One overflowing brine tank in a fourplex is a maintenance ticket; the same failure showing up across three buildings in a year is a case for standardizing on new, high-efficiency equipment before the next unit fails over a finished ceiling. According to Culligan, high-efficiency softeners can be programmed to use less salt, water, and energy than standard units, which also cuts the recurring salt-delivery line item.
There is a limit to DIY here. Identifying the leak location and bypassing the unit is homeowner territory. Opening a control valve to replace a piston seal pack, rebedding resin, or replumbing a bypass assembly is model-specific work where a wrong part or a stripped thread turns a drip into a flood. If the leak traces inside the valve or the tank, bring in a local water treatment specialist rather than guessing.
Regular water softener maintenance, an annual brine tank cleanout, a look at the drain line before winter, and a check of the bypass O-rings, catches most of these leak points before they put water on your floor. On Minneapolis water this hard, the softener works harder than most; a once-a-year checkup is cheaper than a wet basement.
If you need water softener installation, Twin Cities Water Softening can help.
Prefer to talk it through? Call +16512171659 — a quick call is usually the fastest way to get a straight answer for your situation.