
The Water Softener Installation Process: What Happens Step by Step at Your Home
If your softener is 15 years old and starting to act up, you have probably wondered what a replacement actually looks like. This guide walks through the water softener installation steps from the sizing visit to the first glass of soft water. No upsell, no fluff. Just what a local installer does at your Minneapolis home, in the order it happens, and what you should watch for at each stage.
Hard water is not optional here. Minneapolis-area homes drawing from the Mississippi River see hardness of 15+ grains per gallon, according to HomeWater 101. That level of scale buildup wears out water heaters, stains fixtures, and leaves your shower head crusted white. A properly sized replacement fixes all of that, and the install itself usually takes half a day.
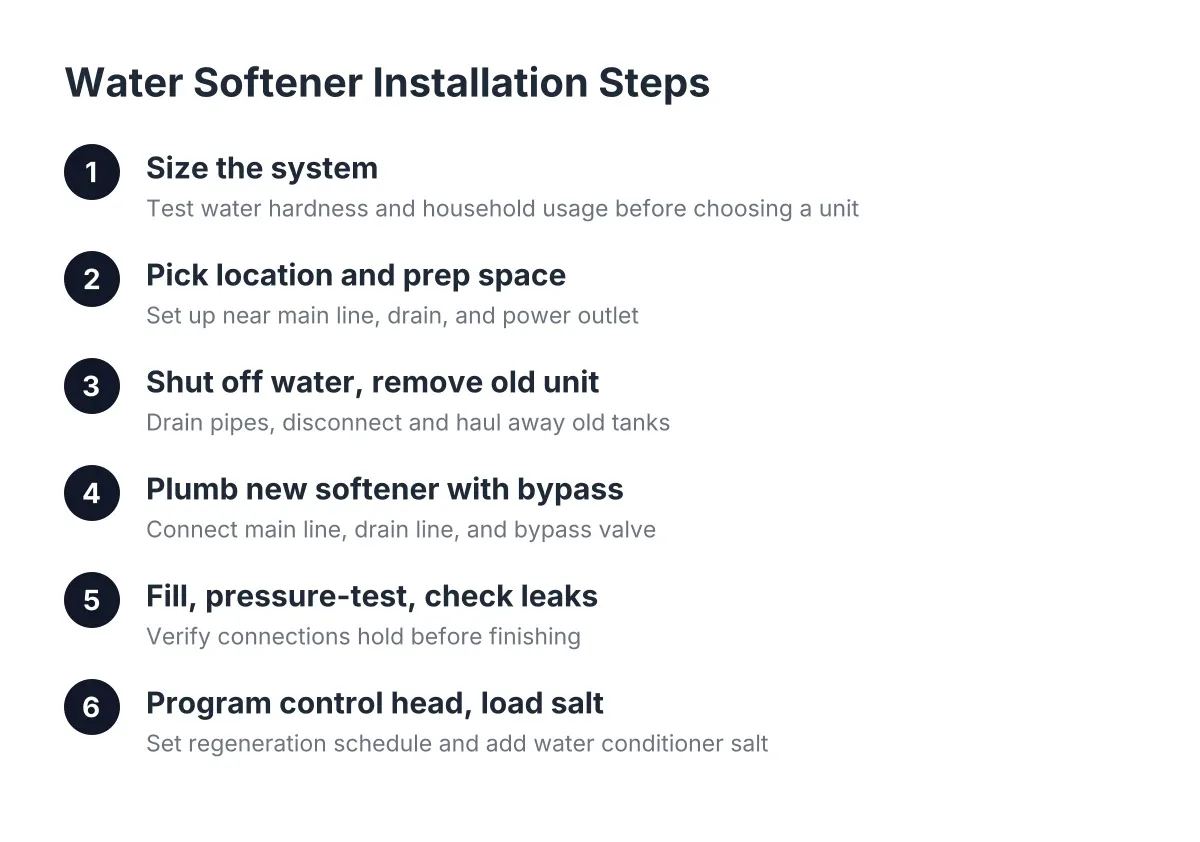
Step 1: Get the System Sized Before Anyone Touches a Pipe
Start with sizing, not shopping. The right softener depends on your water hardness, your household size, and how much water you use. Across 49 measured Minnesota cities, the median hardness is 9.5 grains per gallon, and 61% of cities test hard or very hard, according to USGS Water Science School. Twin Cities water runs harder than that median, so guessing is a bad plan.
A good installer tests your water first, either at the tap or from a sample. On well water in the suburbs, they should also test for iron and manganese, since those cause the orange and black staining you see in tubs and toilets. Ion exchange softeners can help reduce small amounts of iron in well water, according to Penn State Extension, but heavier iron may need a separate filter.
This is where Replacement Planners get burned. If a quote skips the water test and jumps straight to the biggest unit on the truck, get another quote. A family of four in a Minneapolis home does not need a commercial-grade tank. Oversizing wastes money up front and salt every month after.
For example, suppose a homeowner in Golden Valley has a 17-year-old timer-based softener that regenerates every three days whether anyone is home or not. A modern demand-initiated unit sized for their actual usage regenerates only when needed. When evaluating water softener installation steps for your home, modern demand-initiated units can be programmed to use less salt, water, and energy than standard units, according to Culligan. That efficiency gap is a real reason to replace before failure, not just after.
Step 2: Pick the Location and Prep the Space
Every softener installs at the point of entry, right after the main water line comes into the house. In most Minneapolis homes that means the basement utility room, near the water meter. The unit needs three things close by:
- A connection point on the main supply line, before the water heater
- A drain the unit can discharge into during regeneration, such as a floor drain or standpipe
- A standard power outlet for the control head
If you are replacing an old unit, the location is usually already set, which shortens the job. Clear a path from the door to the utility room before install day. The installer will carry in a resin tank, a brine tank, and bags of water conditioner salt, and carry the old tanks out.
Worried about mess in the utility space? A careful crew lays down floor protection, drains the old unit before moving it, and hauls away the old tanks. Ask about haul-away when you compare quotes; it should be included, not a surprise line item.
Step 3: Shut Off the Water and Remove the Old Unit
On install day, the first move is shutting off the main water supply. The installer then opens a nearby faucet to drain residual water from the pipes, which keeps the work area dry and makes cutting into the line cleaner. Expect the water to be off for a stretch of the visit, so plan showers and laundry around it.
Next, the old softener comes out. The installer disconnects it at the bypass valve if one exists, drains both tanks, and removes them. If your old unit was hard-plumbed with no bypass, the installer will note it, because the new setup should fix that gap.
Old resin tanks can be heavy with waterlogged resin, and brine tanks often have a crust of insoluble salt sludge at the bottom. Salt used in water softeners contains insoluble material that builds up in the brine tank over time, according to Cargill. Seeing that sludge is one more sign the old unit was overdue.
Step 4: Plumb the New Softener with a Proper Bypass
Now the new system goes in. The installer connects the softener to the main line so all household water passes through it before branching to the rest of the house. If you are adding a whole-house filter at the same time, it goes inline first, with the softener second, so the filter catches sediment before it reaches the resin bed.
A bypass valve is not optional. Water softener units typically have dedicated inlet and outlet valves separate from the main house shutoff, according to InspectAPedia, which lets you isolate the softener for service without cutting water to the whole house. If your softener ever leaks or needs a resin tank service, that bypass is what keeps the rest of the house running.
Two more connections finish the plumbing stage. The drain line runs from the control valve to the floor drain or standpipe with an air gap, so regeneration water has somewhere to go. Many installers also keep an outside hose bib on hard water, since your lawn does not need softened water and skipping it saves salt.
This is the part of the water softener installation steps where professional work earns its keep. Cutting into a main supply line, sweating or crimping fittings, and meeting local plumbing code is not a first-time DIY project. If you have real plumbing experience you can attempt it, but most homeowners in Minneapolis are better served hiring a local specialist and keeping the liability off their own shoulders.
Step 5: Fill, Pressure-Test, and Check for Leaks
With the plumbing done, the installer turns the water back on in stages. The unit typically starts in bypass so the new joints can be checked and filled under pressure before the resin tank takes on water. This staged fill catches leaks at the fittings while they are still easy to fix.
Once the connections hold, the installer opens the bypass and lets water flow through the resin tank slowly. Air gets purged from the lines at a nearby faucet. Expect cloudy or sputtering water for a minute or two; that is trapped air, not a problem.
Step 6: Program the Control Head and Load the Salt
Programming is where a modern unit separates itself from your old one. The installer sets your tested hardness number, the current time, and the regeneration settings. Demand-initiated units track your actual water use and regenerate only when the resin needs it.
Then the brine tank gets its first load of salt. Softeners rely on salt to regenerate the resin bed, which is what removes hardness minerals from the water, according to North Dakota State University Extension. Most units can also run on potassium chloride instead of standard sodium chloride, according to NSF International; the salt type setting just needs to match what you pour in.
Salt matters beyond your own basement. Seventy-five percent of Minnesotans rely on groundwater for drinking water, and that groundwater is vulnerable to chloride contamination linked partly to softener discharge, according to Minnesota Pollution Control Agency. A Minnesota program in Marshall that replaced timer-based softeners cut salt use by up to 320,000 pounds per year, with some households cutting salt use by as much as 86%, also according to Minnesota Pollution Control Agency. Replacing an old timer unit with an efficient one is the single biggest salt saver available to you.
Step 7: Run the First Regeneration and Walk Through the System
Before leaving, a thorough installer starts a manual regeneration cycle and confirms the unit draws brine, rinses, and drains correctly. Then you get the walkthrough: how to check salt level, how to use the bypass valve, and what the display should show. Ask questions now, while the person who set it up is standing next to the tank.
You should leave the walkthrough knowing three things. First, where the bypass is and how to turn it. Second, your programmed hardness setting. Third, how often to add salt; typical households refill every two to four months, according to Culligan, depending on hardness, family size, and usage.
How Long Water Softener Installation Steps Take
A straightforward replacement in a Minneapolis home takes about two to four hours when the old unit sits in a workable spot with an existing drain and outlet nearby. First-time installations run longer, often four to six hours, because the installer is cutting into the main line and running a new drain. New construction installs are simpler still, since the rough-in is already planned.
Soft water arrives fast. Once the unit is programmed and the first regeneration runs, you get soft water at the tap the same day. However, scale that already coats your water heater and shower head took years to build, so give existing buildup a few weeks to gradually dissolve.
What Landlords Should Know Before Scheduling
Rental owners face the same water softener installation process with one extra variable: tenants. If you own a handful of single-family rentals in the metro, the smart window is unit turnover, when the water can be off for a few hours without a complaint call. Softened water also protects the water heater and dishwasher you own, which is where hard water quietly drains your maintenance budget.
Keep the equipment choice boring on purpose. A durable, demand-initiated single-tank unit with a solid bypass valve covers most rentals without the cost of a dual-tank system built for nonstop soft water. Have the installer show you, not the tenant, how the controls and salt schedule work, and put the salt refill on your turnover checklist.
Your Pre-Install Checklist
Use this short list before you sign off on any quote in 2026:
- Confirm the installer tested your water, including iron if you are on a well.
- Get the recommended grain capacity in writing, with the math behind it.
- Verify the quote includes a bypass valve, drain line with air gap, and haul-away of the old unit.
- Ask whether the outside hose bib will stay on hard water.
- Ask about local rebates; some Minnesota cities have paid $500 to $700 for replacing timer-based softeners, according to Minnesota Pollution Control Agency.
- Schedule for a window when a few hours without water will not disrupt the household or a tenant.
A water softener installation done right is a one-visit job that quietly pays you back through lower salt use, cleaner fixtures, and appliances that last longer. If your current unit is past the 15-year mark, replacing it on your schedule beats replacing it the week it dies. The process above is what a competent local installer should deliver; if a quote skips the water test, the bypass, or the walkthrough, keep comparing.
Prefer to talk it through? Call +16512171659 — a quick call is usually the fastest way to get a straight answer for your situation.